Showing posts with label Crafts. Show all posts

Friday, October 5

New Project // Recovering a Carseat!

A dear friend of mine is having a little girl late this fall and asked in a sewing favor to recover the car seat they used for their little boy. I am so excited to try out a new sewing project! Keep up with this project in my current project tab! The little girl is due in November - so this project will be a moving! 

This is the car seat I will be re-covering. 

Bloom Nightlite - Ruby Star - Melody Miller for Kokka

Pat Bravo - Pure Elements - Solid in Burnt Orange 
Pat Bravo - Pure Elements - Solid in Cherry Lip Gloss

Pat Bravo - Pure Elements - Solid in Dark Citron


Happy Creating! 

Wednesday, October 3

LW's Quilt

I was in a quilt making mood on Saturday shortly after completing Max's Quilt! I fell in love with Riley Blake's Peak Hour by Kellie Wulfsohn Fabric - LOVE!! 


I created my own pattern this time around wanting to play on the zig-zag/chevron pattern. I cut 4.5 inch triangles and then started piecing them together! 
Without further ado... here is the Peak Hour Quilt for Louis! 


Happy Quilting!

Tuesday, October 2

Max's Quilt Finished!!

Well - to finish this quilt I needed a sewing night with my friend, Lindsay! I was so hyped about quilting that I went ahead and finished Max's new cousin, LW's quilt as well! I will be posting about LW's quilt tomorrow! Back to Max's quilt - well to say this quilt was time consuming is an understatement! I really figured out the best way for me, Kady, to cut, sew and quilt with basically finishing two quilts in a matter of 48 hours! 
Without further ado... here is Max's Nautical Themed Quilt!


Happy Quilting!

Friday, September 7

DIY // Birthday Wrapping Paper

Today, I want to share an idea I had for DIY Wrapping Paper. Over the past few months, I have been focusing on de-cluttering my life and apartment. With this de-cluttering, it also means less items coming into the house. Using the left over butcher paper, used for wrapping my books, I decided to decorate it to use as wrapping paper. The last birthday party I attended, I used the butcher paper and crayons - however I thought paint would be better the next time. Without further a-do - here is the DIY Wrapping Paper. 


First, measure and cut the butcher paper to the correct size.
Second, hang butcher paper in an area appropriate for painting.
Third, start painting/stamping/drawing.... 

Fourth, allow butcher paper to dry. 

Fifth, attach the paper to the gift and tie with coordinating ribbon.


Happy Birthday P.s.M.! 
Happy DIY-ing! 

Monday, May 7

Extra

This week officially starts Teacher Appreciation Week and with that came a request to help with the Monday gift for the teachers. Since our teachers are extra special the team is putting together Extra gum with the following quote: "The difference between ordinary and extraordinary is that little extra. Hope you have 18 extra good days!" (18 for the number of work days left in the school year)


Scrapbook Paper to frame out the quote - TJ-Maxx Purchase

Coordinating card stock to print out the quotes. 

Lots of colors to choose from!! 


Final Product (Excuse the poor photo - I was using Intsagram)

Close up of the quote on the paper with the scrapbooking paper! 


Here is the Extra Gift I got on Monday!


Happy Crafting! 


Friday, April 13

DIY: Covered Utensil Holders

Call me green, I like to reuse as much as possible! You will find jars galore in my kitchen awaiting the next project!! Along with jars - I fully clean and sanitize all can food cans after using them. In my office, I have cans labeled with all different types of supplies the children might need when we are working. For the baby shower, I wanted to redo some cans to hold the utensils. In order to go along with the pink and green theme, I took some scrapbook paper and attached it to the sides to spice the cans up... here's the tutorial: 

Materials:
Cleaned Can Food Cans
Double Sided Tape
Scrapbook Paper

  First: 
Clean cans and pinch top (sharp rim) with pliers in order to make sure it is no longer razor sharp.


 Second: 
Pick out matching paper - I ended up sticking with the pink/green and white polka dots. 


 Third:
Measure the width and length of the cans and add 1/2 inch to allow for folding the edges.  Cut the paper to the correct widths/lengths.


Fourth: 
After folding down 1/8 inch on the top and bottom use double sided tape to attach one of the paper to the can. Slowly attach the rest of the paper using double sided tape. I only attached it in two more places before folding over the end edge and taping. 

  
Fifth:
Sit back and enjoy your decorated cans!! 

 What other uses can you think of for these cans? Please share your comments below!

Happy DIY-ing,

Thursday, April 5

Quick Post - Baby Shower

The baby shower was a blast!! Everything came together so nicely. I failed to take pictures... but I did get two pictures from someone who was smart enough to take pictures! 


Happy Thursday! 

Wednesday, April 4

Year of Onesies

My most exciting craft for the baby shower was the... 


Directions for making a Year of Onesies:

1. Gather all the materials
  • 1/2 Yard of Preferred Fabric (100% Cotton)
  • Heat'n Bond Ultra Hold Iron-On Adhesive
  • Letter Templates or Computer/Printer (to print of the individual numbers)
  • Sharpie and Scissors
  • Iron/Ironing Board
  • 12 Onesies (Read Note Below)


 A Note About Onesies
Helpful hint about purchasing Onesies for the "Year of Onesies"
Buy the following packs:
1 - 0-3 months (Will be used for months 1, 2, 3)
1 - 3-6 months (Will be used for months 4, 5, 6)
1 - 6-9 months (Will be used for months 7, 8, 9)
1 - 12 months (Will be used for months 10, 11, 12)
Note: There is no such thing as 9-12 months

2. Decide on Letter Templates or Font. 
I used Minya Nouvelle from 1001freefonts.com
1, 2, 3, 4, 5, 6, 7, 8, 9, 10, 11 & 12

3. Print and cut of the appropriate numbers in order to trace on the Heat'n Bond Adhesive.

 4. Trace the numbers UPSIDE DOWN onto the Heat'n Bond Adhesive. 
Remember: You will have to trace the number 1 - 5 times and the number 2 - 2 times


5. Cut out the numbers and peel off the backing. 


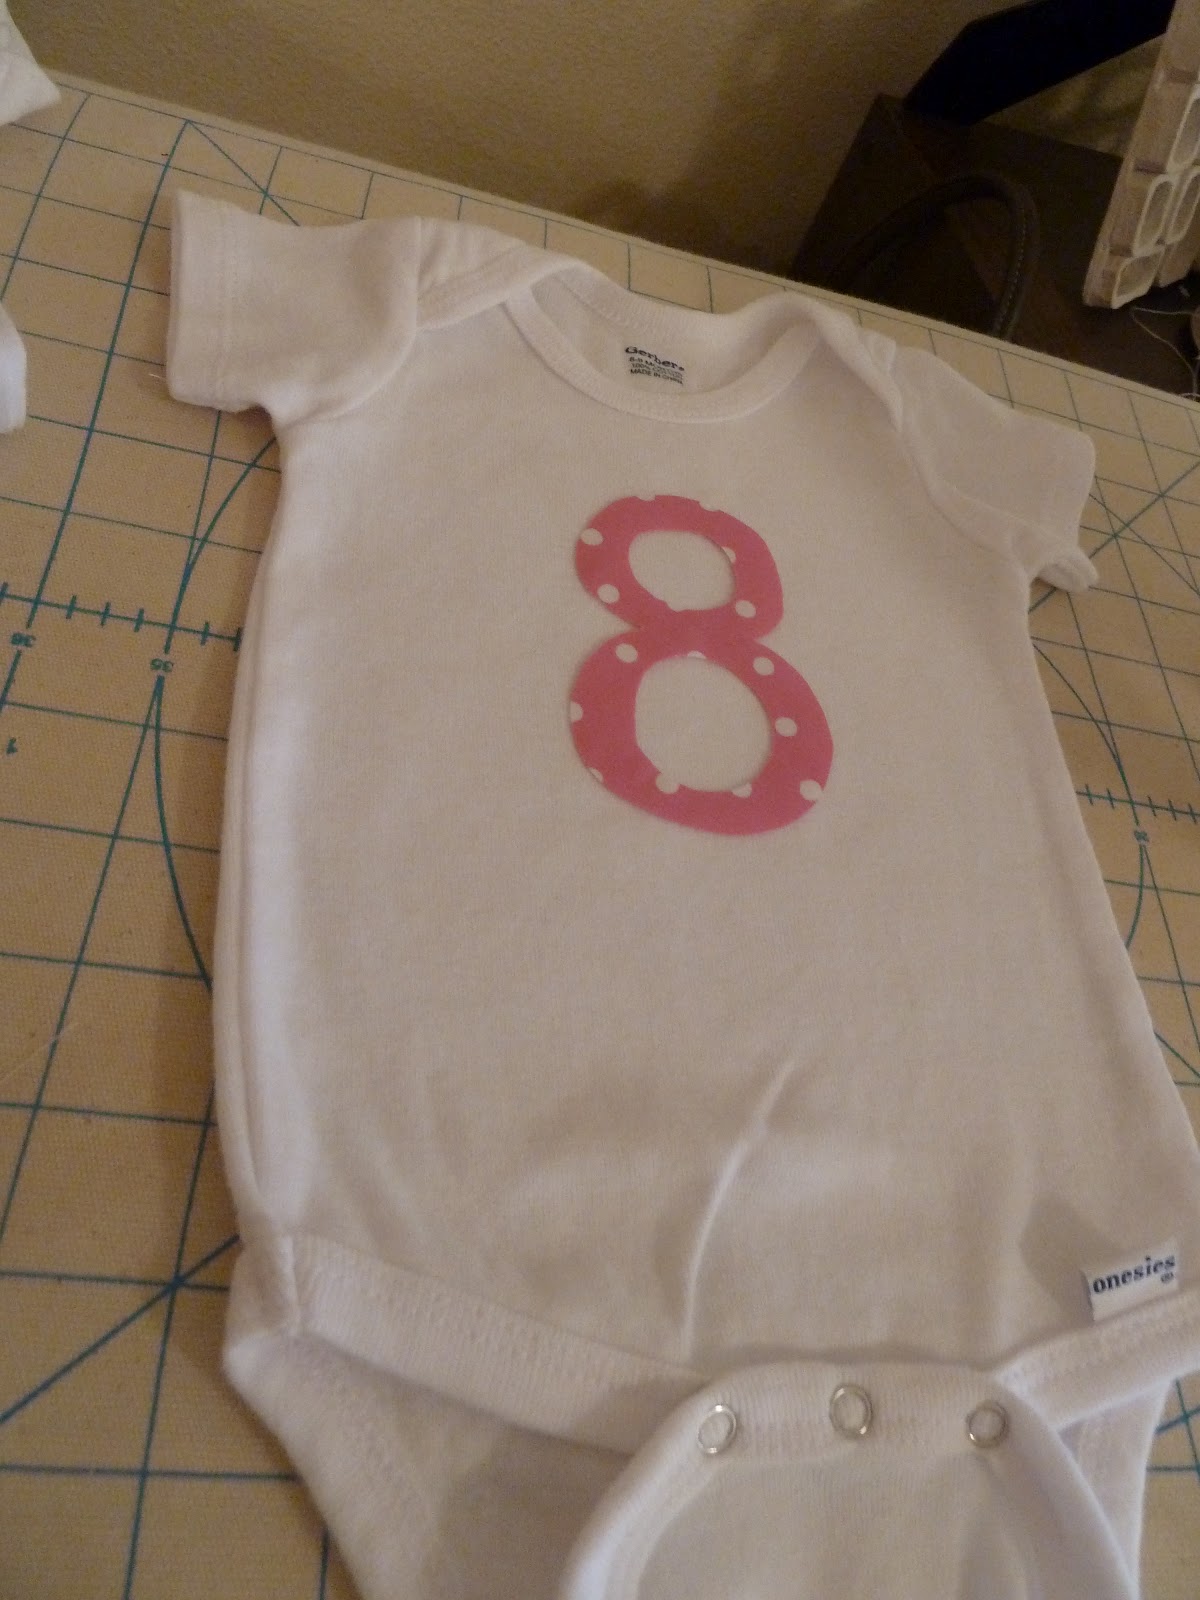
 6. Iron the numbers onto the Onesies.  


 7. Sit back and enjoy your creation.


 Happy Crafting!
Related Posts Plugin for WordPress, Blogger...